

MOFI- Hi-END β22 Stereo Headphone Amplifier DIY KIT & Finished Board
- Fast delivery
- 30-day returns
DIY KIT Project
To complete this project, high level knowledge of electronics and rich experience in terms of soldering and testing are required.
Due to time zone and language communication restrictions, we can only provide limited technical support, and you need to solve problems by yourself.
We do not provide information other than the product introduction page.
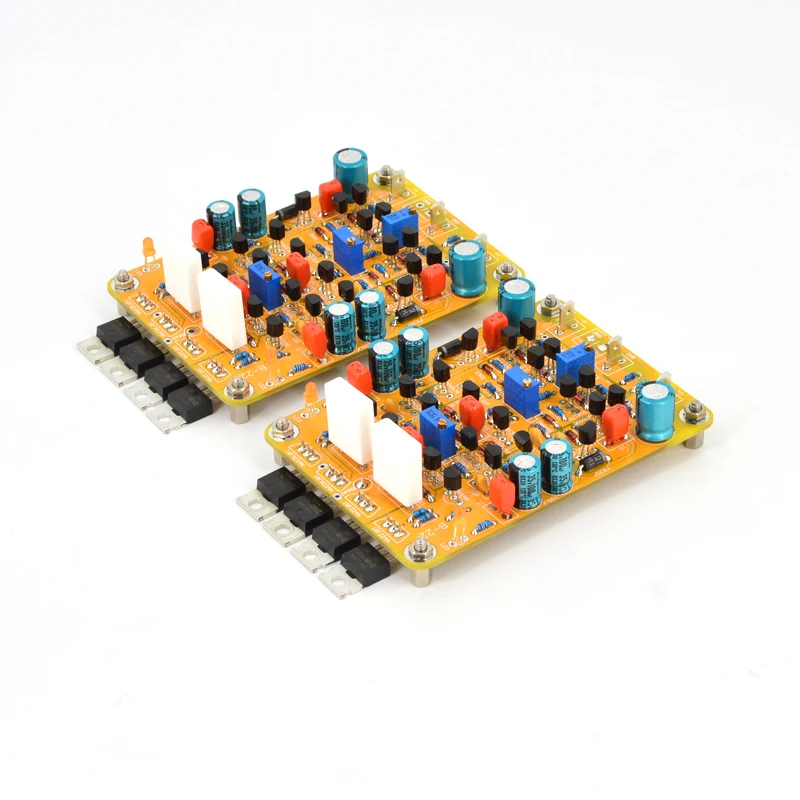
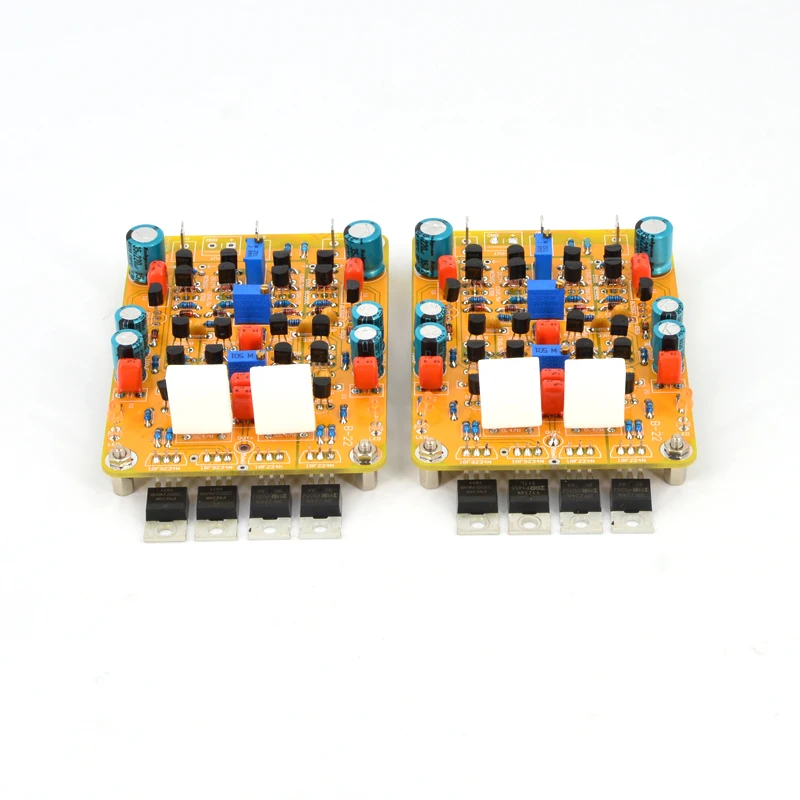
MOFI- Hi-END β22 Stereo Headphone Amplifier DIY KIT Project
All-discrete fully-complementary topology, Complete symmetry from input to output.
JFET + BJT+ MOSFET
Three types of transistors used to best exploit their strengths.
Pure class A operation,Every stage operates in class A.
Dynamic cascoding,Every stage is dynamically cascoded.
Moderate global negative feedback.
High speed, wide bandwidth.
Fully direct-coupled,There are no signal-degrading coupling capacitors at the input, output or negative feedback loop.
High PSRR design,The power rails are connected
directly to the output stage MOSFETs.
High power output.
Adjustable bias and output DC offset.
Passive ground, active ground or fully balanced configurations.
PCB SIZE: 99x70x1.6mm 1oz Cu, HASL with lead
Power requirements: Best:±30VDC I=1A
Product configuration
DIY kit: Contains the PCB and the components needed on the PCB, but does not include the power transformer .
Finished board: Based on the well-tested board on the standard version kit, we verified all key points' voltage, and used the signal generator and oscilloscope for analog waveform double verification. We will not use this board for listening test.
All finished pcbs are all carefully hand-soldered and fully tests, so the price is higher and less cost performance. Price-sensitive consumers but with have DIY ability are recommended to choose the kit.
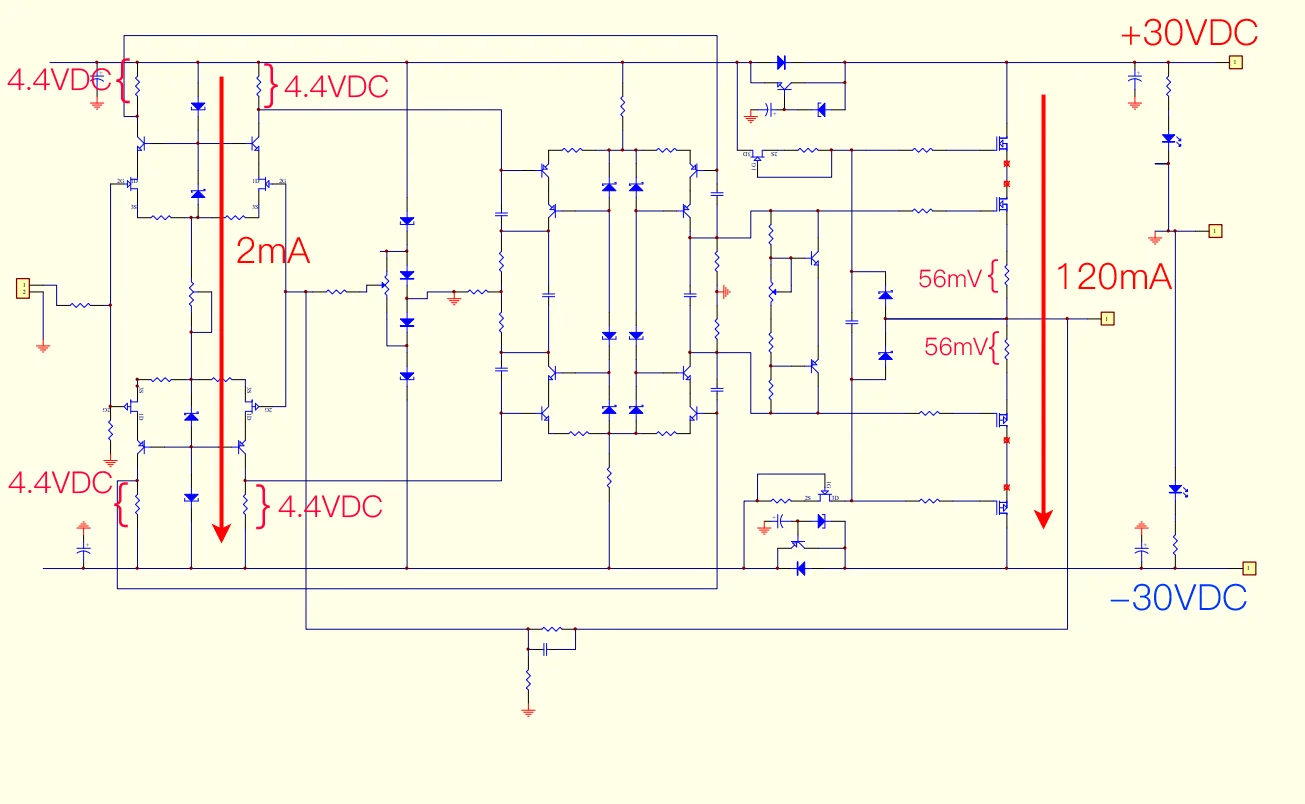
Schematic & key point of debugging
PCB comes with component parameters for easy installation.
We only refer the schematic of the amplification part of the circuit. If you need full circuit parameter, please read the component value with the PCB by yourself; we do not provide additionally.
please keep test point voltage close enough to it, +-20% is also permitted.
DIY KIT Instructions
Since the PCB holes are plated through, you only need to solder the parts from the bottom of the board. Do not drill or enlarge the holes because that would damage the through-plating.
Clean both sides of the blank PCB with paper towel and isopropyl alcohol or electronics flux remover, then solder the components to the board, starting with the lowest profile parts.
Make sure the correct part goes into each position on the circuit board. Measure each resistor with your multimeter to ensure it's the proper value.
Clean up the solder flux residue from the board with isopropyl alcohol (or electronics flux remover) and a brush.
Inspect all solder connections carefully, using a magnifying glass, to make sure there are no solder bridges or cold solder joints. Use a multimeter in ohms scale to check for short circuits. As a minimum, you should verify that the V+ and V- DC inputs are not shorted to ground, or to each other, and that the output pad isn't shorted to ground. Correct any mistakes before proceeding to the next phase.
Tips:
please prepare external heatsink.
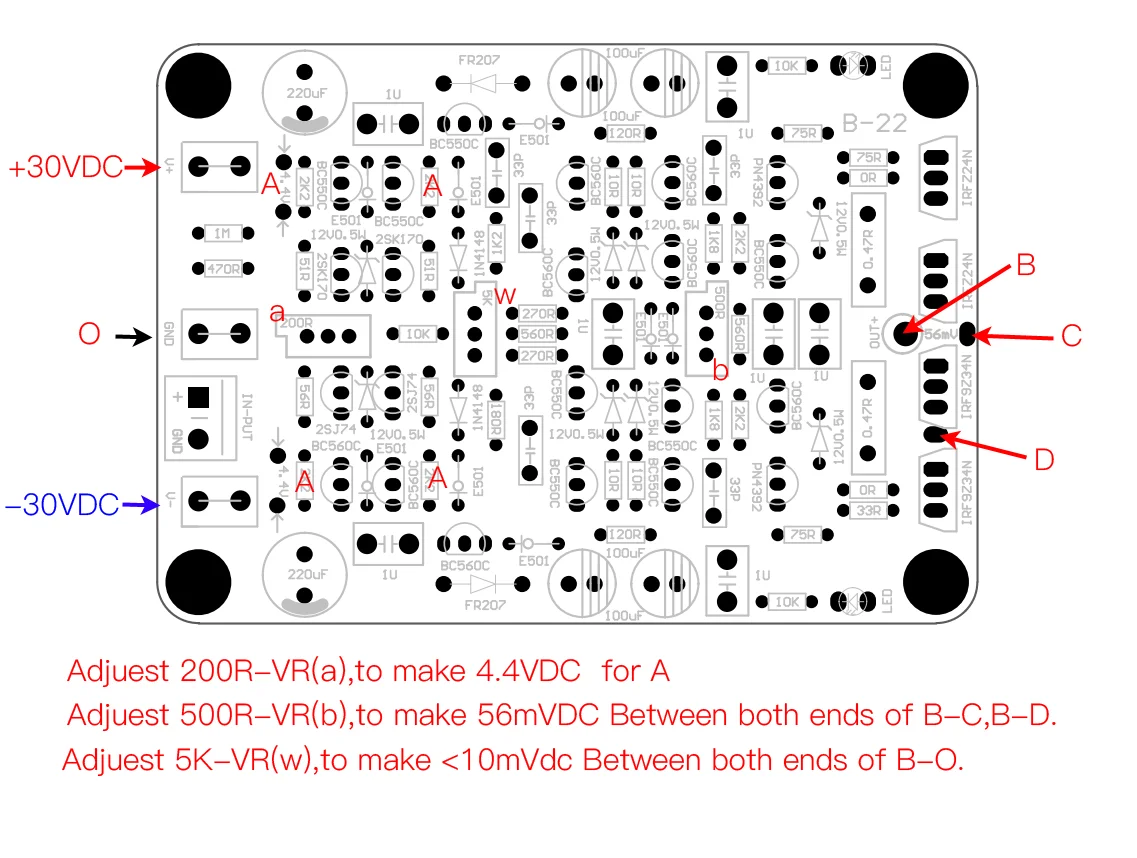
Adjust 200R-VR clockwise to the maximum resistance value before powering on.
Adjust 500R-VR counter clockwise to the maximum resistance value before powering on.
After power-on, slowly adjust 200R-VR counterclockwise until 4.4VDC can be measured betweenA
slowly adjust 500R-VR clockwise until 56mVDC can be measured between BC.BD.
Adjiuest 5K-VR,to make <10mV Between both ends of B-O.
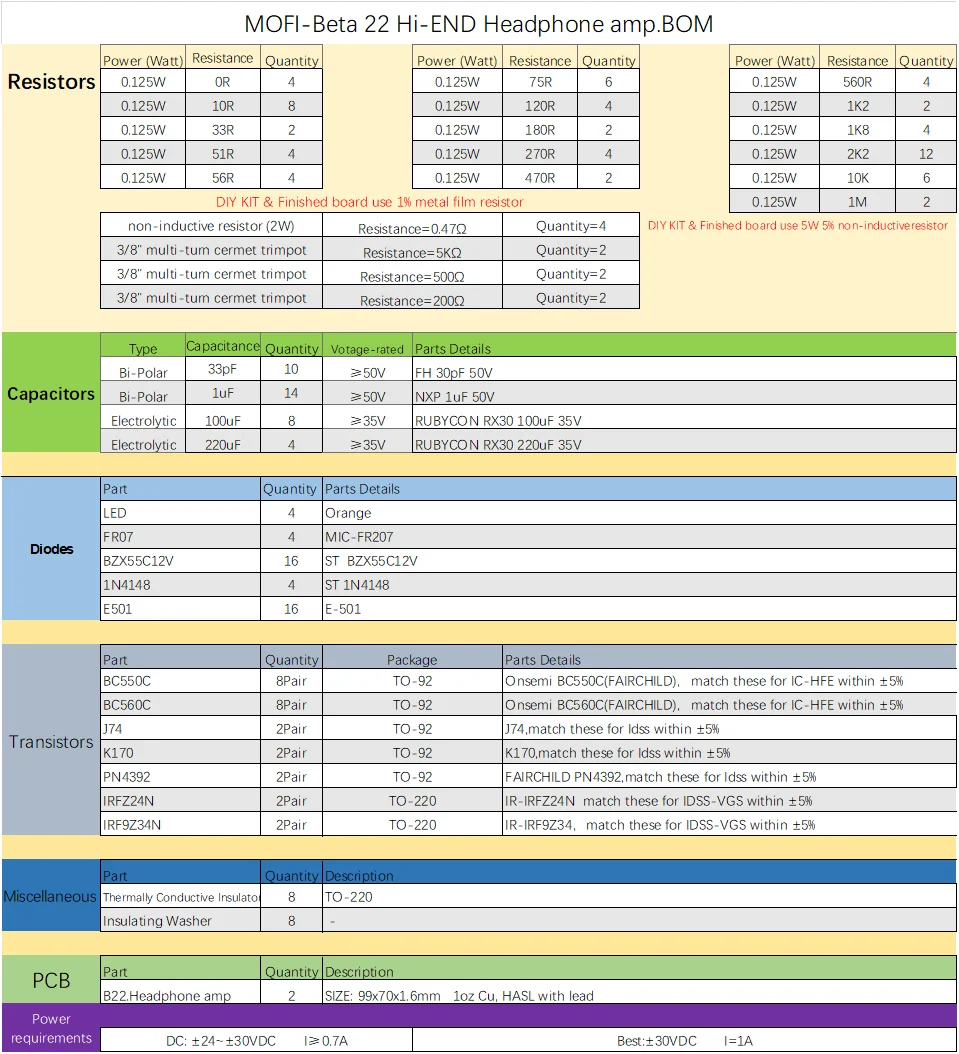
Parts list
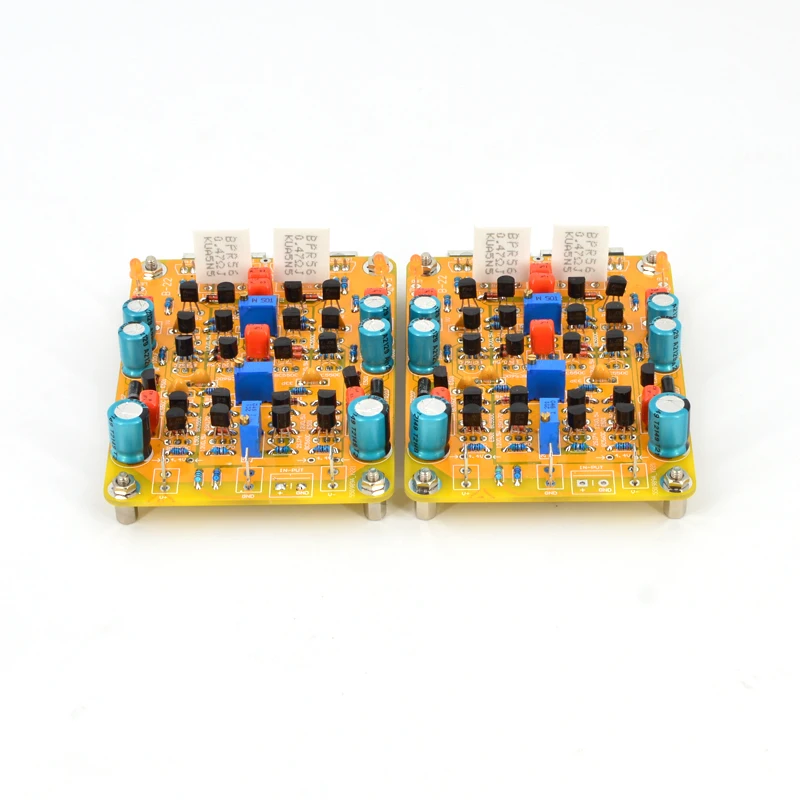
Pics



| Category | Tech & Electronics › Television & Video › DVD Players & Recorders |
|---|---|
| Availability | In stock |
| Ships to | Canada |
| Buyer Guarantees | 15-Day No Update Refund & 60-Day No Delivery Refund |
No reviews yet
Be the first to share what you think of this product.


